Before an article becomes a fully paid-up member of the website, it needs to be added to the website's Main Menu, and possibly to a Local Menu.
Main Menu:
The Main Menu is a hierarchical list of all the pages in the site. Level 1 of this hierarchy currently consists of seven pages: Home, What's On, Amenities, Community, History, Gallery and Contact Us. Below the What's On page, there are three Level 2 pages: News, Event and Diary. There is no limit to the depth of nesting allowed, but only the top 3 levels are actually displayed in the site's main menu (hence the need in some cases for Local Menus (see below).
To add a new article to the site's Main Menu, you first need to decide where the article should sit in the site's hierarchy. For example, if the new article is part of the site's Gallery, it will sit logically below the Gallery page, and if it is part of a Street Fayre section in the Gallery, it will sit at a lower level below a Street Fayre page. Having decided where the article sits, you now need to create its Main Menu item. Go to the Dashboard, click Menus in the left-hand vertical menu, and click the + symbol next to Main Menu. This will open up a menu item editor (see below).
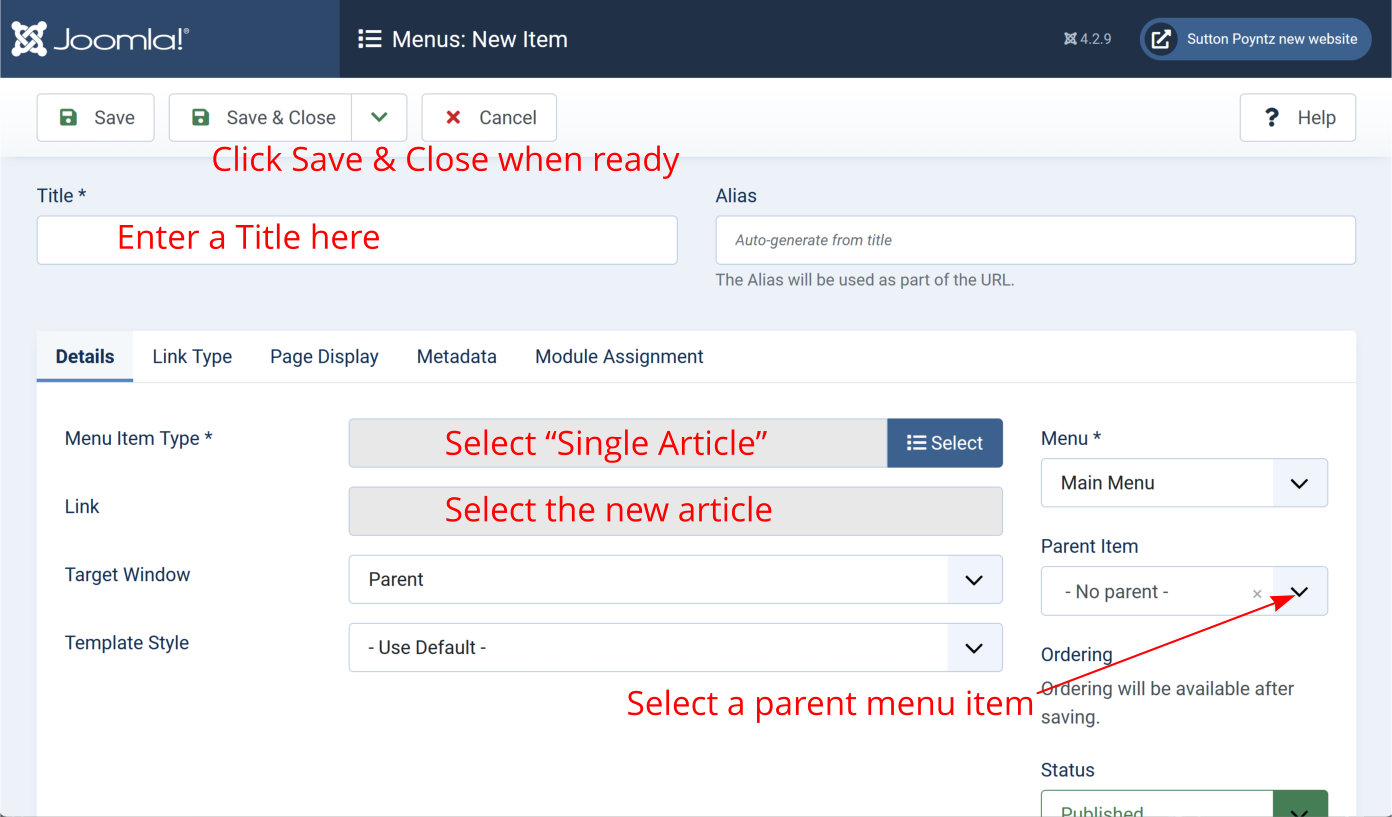
Enter a Title for the menu item - you do not have to, but you can use the same as the article's Title. In the Menu Item Type box, you need to click the Select button, click Articles and then select Single Article (you will probably need to scroll down to find this option). A Select Article box will now appear; click Select in order to select your new article (which will probably be at or near the top of the article list).
You now need to click in the Parent Item box in order to find and choose the Main Menu item that this new article is to sit below in the site hierarchy. In the example above (a new article to sit in a Street Fayre section of the Gallery), you can search for Street in order to find the right menu item.
When you are ready, click Save & Close.
Local Menu:
As stated above, the site's main menu (the hamburger menu icon displayed top centre on every page) only opens up to level 3 of the site's hierarchy. This means that in parts of the site where there is a deeper level of page nesting, a Local Menu is needed. An example is the History Group area, where the History Group page itself is at level 3, and every other page sitting below History Group is inaccessible via the site's main menu.
I will assume that the new article you have created sits in an area where there is already a suitable Local Menu (instructions for creating a new Local Menu will be added later). To create a Local Menu item for a new article, go to the Dashboard, click Menus in the left-hand vertical menu, and click the + symbol next to relevant Local Menu (for example Biodiversity Group Menu). This will open up a menu item editor, as illustrated above. As before, you need to give this new menu item a Title, and select a parent menu item. There are one difference in the actions for a Local Menu item compared with a Main Menu item:
- In Menu Item Type, you need to select Menu Item Alias, which you will find in the System Links group. You will then see a Menu Item box; click Select here and find and select the Main Menu item that you have just created for this article.
At this stage, it is necessary to ensure that the Local Menu actually displays on the new article's webpage. To do this:
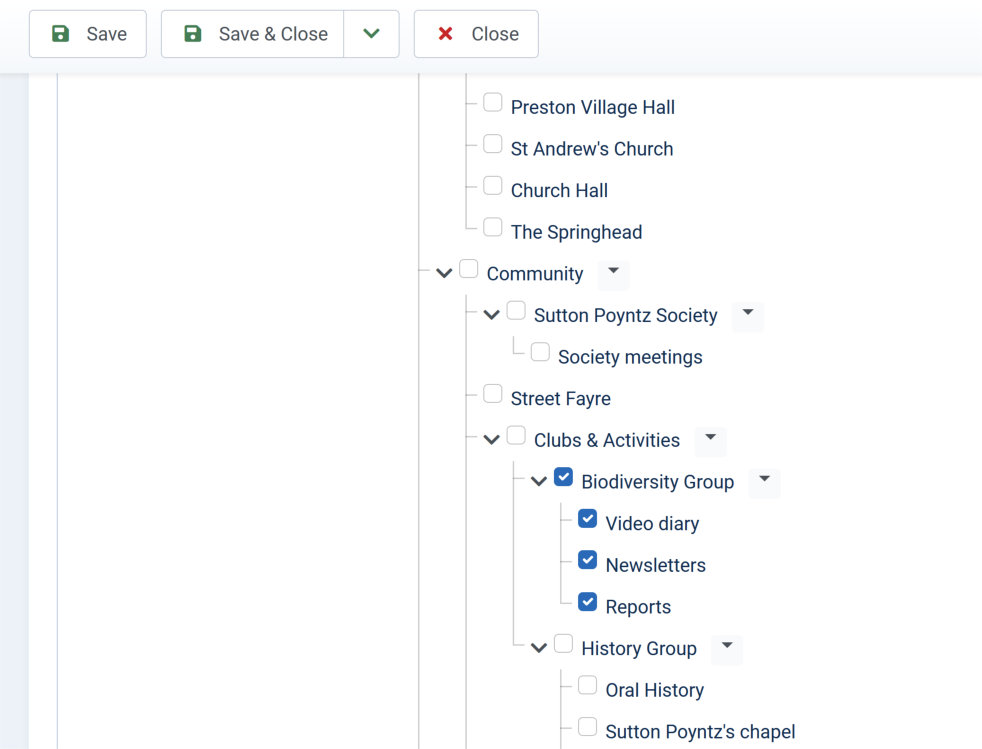
- In the Dashboard, click Content and then click Site Modules. This opens a list of what are called Modules, which are displayable entities used in the website. In this list, find and click the one for the applicable Local Menu (Biodiversity Group Menu) for example).
- This takes you to a Module Editor page. Click the Module Assignment tab; this takes you to a list of articles that this Local Menu is displayed on. Scroll down to find your new article (as in the illustration below), and click the check-box next to your article. Click Save & Close.